


![How to Make an Embroidered Hat Mockup From Your Logo [2026]](https://dynamicmockups.com/wp-content/uploads/2026/08/embroidered-hat-mockup-cover-768x403.png) Embroidery
Embroidery
On this page
How Do You Make an Embroidered Hoodie Mockup?
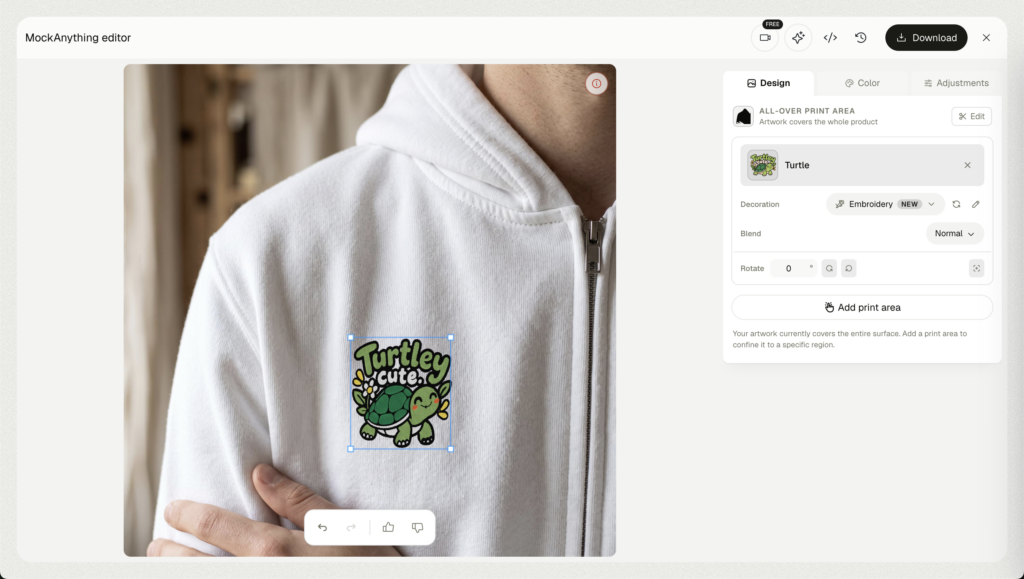
An embroidered hoodie mockup starts with one file: upload your logo PNG, let Stitch AI render it as real thread, set the placement, then swap the hoodie color to match your catalog. Export the on-model shot and a ready-to-stitch DST, all free in the browser.
That’s the whole job in a couple of minutes.
Here’s why it’s worth doing right. Embroidery reads nothing like a flat print.
The thread sits raised off the fabric and catches the light with a soft sheen. It also runs into real placement limits, seams, a kangaroo pocket, a hood, sometimes a front zipper, that a printed PNG never has to think about.
If your mockup ignores those limits, your sample won’t match your listing photo. That gap shows up later as returns and bad reviews.
Accurate mockups do the reverse. They set the right expectation, so the hoodie that arrives looks like the one the buyer clicked.
Embroidery also sells at a premium, and shoppers expect the photos to prove it. A crisp, stitched-looking mockup is what earns that higher price before anyone reads the description.
This guide is for print-on-demand sellers and merch brands who need a listing image today, not a three-day render queue. Whether you sell on Etsy, Shopify, TikTok Shop, or your own store, the job is the same.
You have options for the tool itself. We compared the best embroidery mockup generators if you want the full rundown, but the one feature that matters most is real thread rendering instead of a flat logo overlay.
A good hoodie embroidery mockup shows the stitches, not a sticker.
Already selling caps too? The embroidered hat mockup guide runs the same five steps for hats and beanies.
From Logo PNG to Embroidered Hoodie Mockup in 5 Steps
The workflow below mirrors how you’d make an embroidery mockup online for any product, tuned for the quirks of a hoodie.
Step 1: Upload Your Logo PNG
Start with the cleanest file you have: a transparent PNG at the highest resolution you can find.
A transparent background matters because the software needs to read the shape of your artwork, not a white box around it. Low-res files stitch soft and muddy, so always upload the big version even if your listing only needs a small image.
Vector art is a bonus if you have it, but a sharp PNG is plenty to get started.
Step 2: Let Stitch AI Render It as Real Thread
This is where our Stitch AI tool turns the flat PNG into thread.
Stitch AI reads your artwork and maps it to the three stitch types real machines use:
- Satin stitch: smooth, glossy rows for text, borders, and thin shapes.
- Fill stitch: dense coverage for larger solid areas and backgrounds.
- Run stitch: a single thin line for outlines and fine detail.
It layers thread sheen on top, so the preview shows how light will actually hit the stitches. What you see on screen is close to what the machine will sew.
That preview is your first quality check. If a thin line disappears or small text turns to mush, you’ll see it now, not after you’ve paid for a sample.
Step 3: Set the Placement
Drag your design onto the hoodie and choose the spot: left chest, center chest, sleeve, or the back of the hood.
Placement is doing a job here beyond looks. It decides how big the design can be and whether it clears the pocket and the zipper, which we break down in the next section.
You can also stack placements, a left chest logo plus a small sleeve wordmark, as long as each one has room to breathe.
Step 4: Swap Colorways
Change the hoodie color without re-uploading anything.
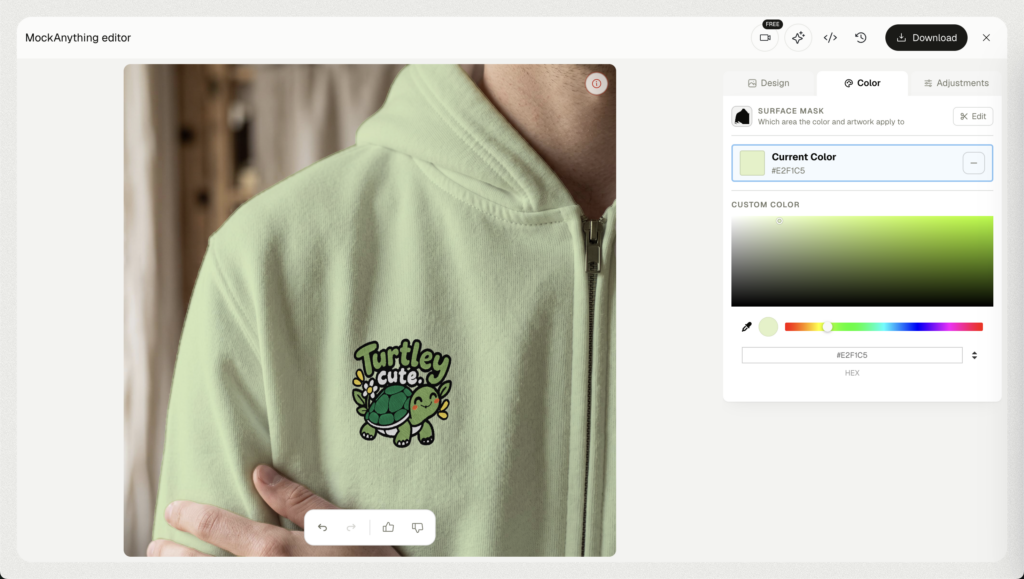
Black, navy, cream, heather grey, the logo stays locked in place while the garment underneath changes. This is how you build a full variant set from a single setup, and how you keep every image in a listing consistent.
Step 5: Export Your Shots
Pull the three images every listing needs: the on-model front, a clean flat lay, and a tight stitch close-up.
Export at a high resolution so the shots stay sharp when a marketplace lets buyers zoom in. A square crop fits most listing grids, and a wider version covers your own site’s hero image.
💡 Pro tip: Don’t stop at the picture. Export the ready-to-stitch DST too, so you leave with a machine file, not just a picture. If you’re not sure what a DST file is, it’s the stitch-by-stitch file your embroidery machine reads, and one hoodie embroidery DST file means your digitizing is finished before your first order lands.
Hoodie Embroidery Placement: Left Chest, Center, Sleeve, and Hood
A hoodie is not a blank t-shirt. It has parts a tee doesn’t: a kangaroo pocket, a hood, a long sleeve run, and sometimes a front zipper.
Each of those limits where your embroidered hoodie design can go and how big it can be. Good hoodie embroidery placement starts with what the garment physically allows, then fits the art to the space.
Here’s the quick reference:
| Placement | Typical size | Best for | Watch-outs |
|---|---|---|---|
| Left chest | 3-4 in wide | Logos, wordmarks, monograms | Keep clear of the zipper seam |
| Center chest | Bold, larger scale | Big graphics, brand statements | Kangaroo pocket eats low space |
| Sleeve | 2-3 in wide | Short wordmark or small icon | Curved surface, simplify detail |
| Hood | Small, 2-3 in | Logo on the back of the hood | Double layer, test the sew-out |
Left chest hoodie embroidery is the safe default for a logo. Across most adult garments a left chest design runs about 3 to 4 inches wide, and a heavier hoodie face can carry up to roughly 4.5 inches before it starts to look crowded.
Text-heavy logos can run a touch wider so the lettering stays legible. Square or stacked marks sit comfortably at the smaller end of that range.
Center chest is where you go bold. Just mind the pocket.
The kangaroo pocket eats the lower-center of the garment, so keep centered art high, above the line where the pocket seam starts. Drop it too low and half your design hides behind a fold.
If a logo needs to sit nearer the pocket line, shops often keep it around 3.5 inches square so it stays balanced.
Sleeve embroidery stays small. A wordmark or icon around 2 to 3 inches wide reads cleanly on the curved run of the arm, while anything bigger fights the fabric.
The hood is the sleeper spot. A small logo on the back of the hood peeks out when the hood is down, but it’s a double layer of fabric, so test the sew-out before you commit to a run.
Not sure which to pick? Start with a left chest logo on the front and add a small sleeve hit. That combination covers most embroidered hoodie design briefs without crowding the garment.
Fabric and Zippers: What Changes How Hoodie Embroidery Reads
Two hoodies can take the exact same logo and hand you back two very different stitch-outs. The fabric and the front closure are usually why.
- Fleece and sherpa: a deep, soft pile swallows fine detail and lets small stitches sink below the surface. Size the design up, simplify thin lines, and lean on bolder shapes.
- Heavyweight cotton: a flatter, denser face holds crisp, sharp stitch definition, so this is where small text and fine logos look their best.
- Zip-up hoodie: a center zipper splits any centered design straight down the middle. Move the art to left chest, split it on purpose either side of the zip, or send it to the back.
On high-pile fleece, a layer of water-soluble topping helps stitches sit on the surface instead of sinking. The simpler fix, though, is still a bolder design with fewer thin lines.
The point of the mockup is to catch all of this before you pay to digitize.
Preview your logo on the fleece version and on the heavyweight version, with the zipper and without it. Fixing placement in a preview costs nothing. Fixing it after a sample sew-out costs time and thread.
This is also why a real render beats a flat overlay. An embroidered hoodie mockup generator that shows thread on the actual fabric tells you how the design will read; a sticker slapped on a photo tells you nothing.
The 3 Angles Every Hoodie Listing Needs
One photo won’t sell an embroidered hoodie. Buyers want to see it from a few angles before they trust the quality, especially at embroidery prices.
- On-model front: shows fit, drape, and the true scale of the design on a real body. This is your main listing image.
- Flat lay: a clean, even catalog shot that’s easy to recolor for every variant in the set.
- Stitch close-up: a tight crop that proves the thread is real embroidery and not a printed graphic.
That close-up does more work than it looks. Shoppers judge embroidery quality by the texture, the raised thread, and the neatness of the edges, and that is exactly what lets you charge more than a printed hoodie.
So never skip it. The close-up is the shot that turns “nice design” into “worth the price.”
Shoot all three from the same template and they’ll match: same color, same lighting, same scale. That consistency is what makes a listing look deliberate instead of thrown together.
Reuse One Hoodie Template Across Every Colorway
Here’s the part that saves you the most time. Once you’ve set a hoodie template, you never have to rebuild it.
Save the placement and sizing once, then re-skin the same template across black, navy, cream, and the rest of your colorways in seconds. The logo stays put while the garment color changes underneath.
Selling one design in six colors? Use the Bulk Mockup Generator to produce the full colorway set for a listing in one pass, instead of rebuilding each image by hand.
Start from our hoodie mockup templates and recolor out from there.
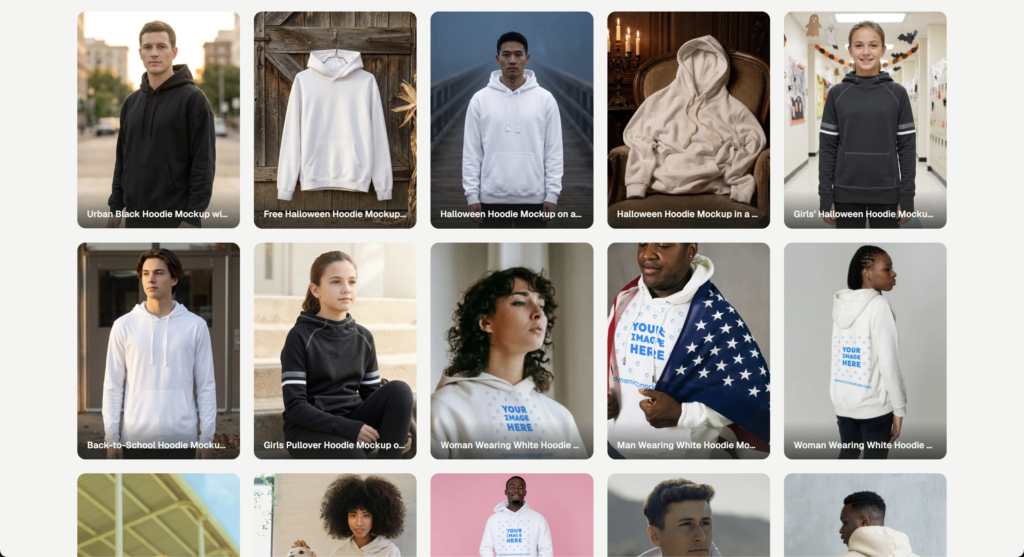
Add a new colorway next month? Open the saved template, pick the color, export. No rebuild.
We built Dynamic Mockups for exactly this kind of repeatable, high-volume work. Here’s what you get:
- 100,000+ free templates: hoodies, tees, hats, and more, ready to edit in the browser.
- Stitch AI thread rendering: turns your logo PNG into realistic satin, fill, and run stitches with real thread sheen.
- DST export: leave with a ready-to-stitch machine file your embroidery machine can read.
Keep learning: if you’re building a shop around this, here’s how to start a hoodie business from the ground up.
Build your first embroidered hoodie mockup for free, straight from your logo.
Showcase your E-commerce products like big brands, without costing a fortune. Sign up today. No credit card required. →
Frequently Asked Questions
How do you make an embroidered hoodie mockup without Photoshop?
Upload your logo PNG to a browser-based mockup tool, let Stitch AI render it as real thread, set the placement, then swap the hoodie color. Export your on-model shot and a ready-to-stitch DST file. The whole job takes a couple of minutes, and it’s free with no Photoshop and no render queue.
Where should you place embroidery on a hoodie?
Left chest is the safe default for a logo, running about 3 to 4 inches wide. Center chest works for bold graphics, but keep them high above the kangaroo pocket. Sleeves take a small wordmark or icon at 2 to 3 inches, and the back of the hood suits a small logo that peeks out when the hood is down.
Does embroidery look good on a fleece hoodie?
It can, but fleece and sherpa have a deep, soft pile that swallows fine detail and lets small stitches sink below the surface. Size the design up, simplify thin lines, and lean on bolder shapes. A layer of water-soluble topping helps stitches sit on top. Heavyweight cotton holds crisper detail, so preview both before you digitize.
Can you embroider across the center of a zip-up hoodie?
Not cleanly. A center zipper splits any centered design straight down the middle, so a full chest graphic won’t work on a zip-up. Move the art to the left chest, split it on purpose either side of the zip, or send it to the back. Preview it with the zipper in place before you commit to a sew-out.
What file do you need to actually stitch an embroidered hoodie design?
You need a DST file, the stitch-by-stitch machine file your embroidery machine reads to sew the design. A mockup image alone won’t run on the machine. The best tools export a ready-to-stitch DST alongside your listing photos, so your digitizing is finished before your first order lands. Leave with the machine file, not just a picture.
![Can ChatGPT Make an Embroidery File? We Tested It [2026]](https://dynamicmockups.com/wp-content/uploads/2026/10/can-chatgpt-make-embroidery-files-cover-768x403.png)