


![Can ChatGPT Make an Embroidery File? We Tested It [2026]](https://dynamicmockups.com/wp-content/uploads/2026/10/can-chatgpt-make-embroidery-files-cover-768x403.png) Embroidery
Embroidery
On this page
How to Make an Embroidered Hat Mockup: The Quick Answer
Here’s the fastest way to make an embroidered cap mockup from your own logo. Open Dynamic Mockups, pick a hat template, set the decoration method to Embroidery, and upload your logo as a PNG. The Stitch AI agent renders a photoreal thread preview scaled to the cap’s real print area, in seconds, with no Photoshop.
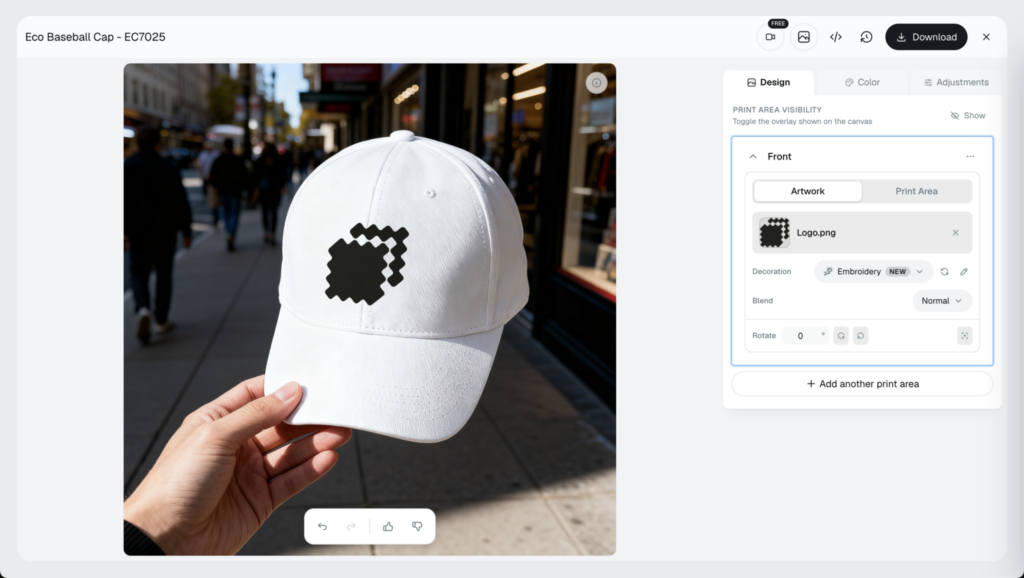
It’s free to start, and no credit card required.
That one upload gives you two outputs.
| What you get | What it’s for |
|---|---|
| Photoreal thread preview | Listings, client pitches, ad creative |
| Downloadable DST machine file | Sending to your embroiderer or machine |
The preview is what you sell from and the promise is what your customers will get in a package. The machine file is what you produce from, if and when the orders come in.
You don’t need two tools or two files for that. The same PNG feeds both the preview and the machine file, so there’s nothing to redraw later.
Why caps specifically? Because buyers want to see a logo on the cap front or left panel before they order, and a flat PNG pasted onto a hat photo never reads as real stitches. An embroidery hat mockup only works if the thread looks real, which is exactly what Stitch AI is built for.
Why Caps Are the Trickiest Embroidery Mockup to Get Right
A cap is not a flat surface. The front panel is structured and curved, there’s a seam running up the middle, and the bill casts its own shadow.
Paste a flat logo straight onto that and it sits there like a sticker. No curve, no thread texture, no shadow. Shoppers spot it in a second.
Most general mockup tools make it worse. They treat a cap like a flat tee and stretch a graphic across a curved panel, ignoring the seam and the bill, so the logo looks painted on rather than sewn.
That’s the whole problem, because the image is doing all the selling. Your customer can’t hold the cap or feel the stitching before they buy, so the mockup is the product in their eyes.
The numbers back this up. Nine in ten online shoppers rate high-quality product photos as one of the most important factors in a purchase, and products with professional-quality photos convert around 33% better than low-quality ones.
A custom cap is also a considered buy. Research from Tilburg University found that in-context product images lift sales most for higher-priced items and when buyers are least certain, which is the exact moment a shopper is deciding whether your cap is worth it.
Then there’s the second trap: staged stock photos. Most “embroidery mockups” online are polished shots of someone else’s blank cap, not your logo in real thread. They look sharp and sell nothing of yours.
If you want to see how the tools stack up, we compared the best embroidery mockup generators and how each one handles stitch detail.
The cap front is a small canvas, and so is a left chest logo. That’s where stitch detail and thread sheen carry the whole illusion. Get the scale or texture wrong and it reads as fake.
Real embroidery catches light along the direction of the stitch, which is why a thread preview looks alive and a pasted graphic looks dead. On a tiny cap-front mark, that texture is most of what a buyer is judging.
A misleading image costs you after the sale, too. About 22% of products get returned because they look different in person, and a mockup that overpromises is a return waiting to happen.
For a brand or a merch agency, the stakes are simpler: a believable cap mockup is what closes the pitch. The client wants to see their logo on the actual hat before they sign off, the same way they expect sharp branding product mockups for every other item in the deck. Get the cap right and you earn the yes, or the add-to-cart.
Step-by-Step: Turn Your Logo Into an Embroidered Cap Mockup
Five steps, start to finish. No design software.
Step 1: Pick Your Cap Style
Create a free account in Dynamic Mockups and search for the free available Hat mockup templates.
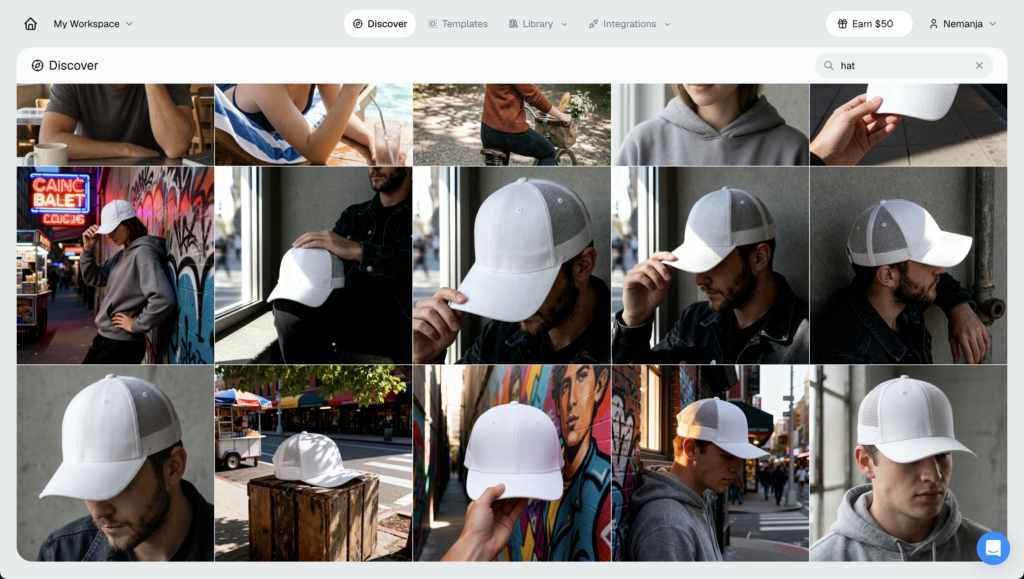
Match the mockup to the blank you’ll actually sell:
- Dad hat: unstructured, low profile, the safe seller for most logos.
- Trucker: foam front and mesh back, built for bold, simple marks.
- Snapback: flat bill and structured front, the streetwear pick.
- 5-panel: a clean, near seam-free front for wide logos.
- Beanie: no bill, folded cuff, a different placement entirely.
A dad hat mockup is the safe default for most logos, while a trucker hat mockup suits a bigger, bolder mark. Pick the one your customer already pictures when they think of your brand.
Match the template to the blank you actually source, structured versus unstructured included. If your preview shows a stiff snapback but you ship a soft dad hat, the photo and the product won’t agree, and that gap shows up in reviews.
Step 2: Upload Your Logo as a PNG
Upload your logo as a clean PNG, ideally on a transparent background. Position it on the cap front, centered above the bill, or move it to the left panel if that’s your placement.
Keep it inside the print area the template marks out. A cap front is small, so oversized art is the most common mistake here.
Flatten the logo before you upload it, and strip any white box behind it. A transparent PNG lets the thread sit directly on the fabric, with nothing boxy framing the mark.
Step 3: Set the Decoration Method to Embroidery
Switch the decoration method from print to Embroidery. This is the step that changes everything.
Print mode lays your logo down flat, like ink. Embroidery mode tells the engine to render your logo as thread, with the raised texture and directional sheen that real stitches have.
Step 4: Let Stitch AI Render the Preview
Now the Stitch AI agent does the work. It renders your logo as a photoreal thread preview, wrapped to the curve of the cap and scaled to its print area.
Check two things: scale and placement. Does the logo sit where a real embroiderer would put it, and is it a believable size against the panel?
As a rough guide, a cap-front logo spans the middle of the panel, not edge to edge. If it crowds the seams, scale it down until it looks like something a machine would actually sew.
Step 5: Save It as a Reusable Template
Happy with it? The template is saved automatically and you can reuse for every colorway and every new logo. Saved templates stack up into a library, so your next logo drops onto the same cap in one click. The same flow carries straight to apparel, so you can build an embroidered hoodie mockup from that same logo when caps aren’t your whole line.
One tip before you move on: a clean, high-contrast PNG stitches best. Thin gradients and tiny text are where previews, and real stitch-outs, tend to struggle. All of this is free, with no Photoshop and no credit card required.
Refine the Cap: Thread Colors, 3D Puff, and Edge Finishes
A raw preview is a good start. The details are what make it look like it came off a real machine.
Open the Embroidery studio in Dynamic Mockups to fine-tune the stitch, no design skills needed.
- Thread color per region: set a separate color for each part of your logo so a multi-color mark reads correctly, instead of collapsing into one flat block.
- 3D puff: turn on puff for a raised, foam-backed front, the look buyers expect on structured caps and snapbacks.
- Edge finish: add a merrow or stitched border where the design calls for it, the way patches and bold logos are usually finished.
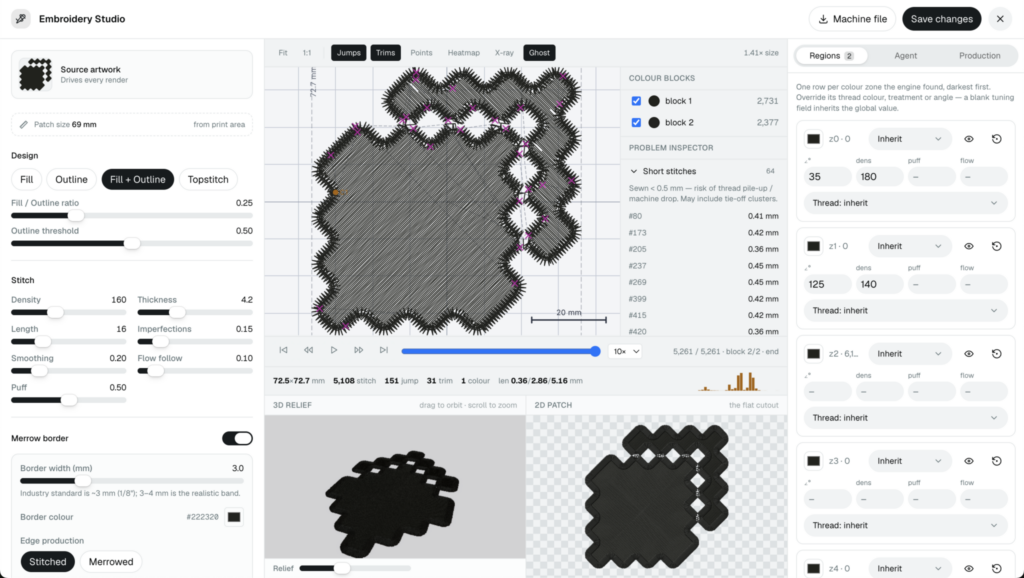
Puff is worth calling out. On a structured cap front, a flat logo can look under-baked, while a raised 3D front reads as premium, the same effect you see on team and streetwear caps.
Stitch type matters as much as color. Satin stitching gives clean edges on text and thin borders, while fill covers the larger shapes. Matching those to your logo keeps the preview honest about how the cap will sew out.
💡 Pro tip: Keep small text and thin lines legible. Tiny details are the first thing to break, both in a preview and on a real embroidery machine. If your logo has text under about a quarter inch tall, thicken it or simplify the mark before you commit.
Reuse One Template Across Colorways, Left Chest, and Beanies
One saved template is a whole product line waiting to happen.
Swap the cap color to build a full colorway set without re-uploading anything.
Move the same logo to a left chest placement for a matching polo or tee, and you have a coordinated set from a single file. A left chest embroidery mockup sits about where a real embroiderer would stitch it, so the pairing looks intentional. Keep that mark small, usually just a few inches across, so it stays in proportion the way apparel decorators place it.
Drop that logo onto a beanie and you have cold-weather stock covered as well, an embroidery beanie mockup from the same source art, no new upload. A beanie shifts the logo up onto the cuff, so check that placement rather than reusing the cap-front spot blindly.
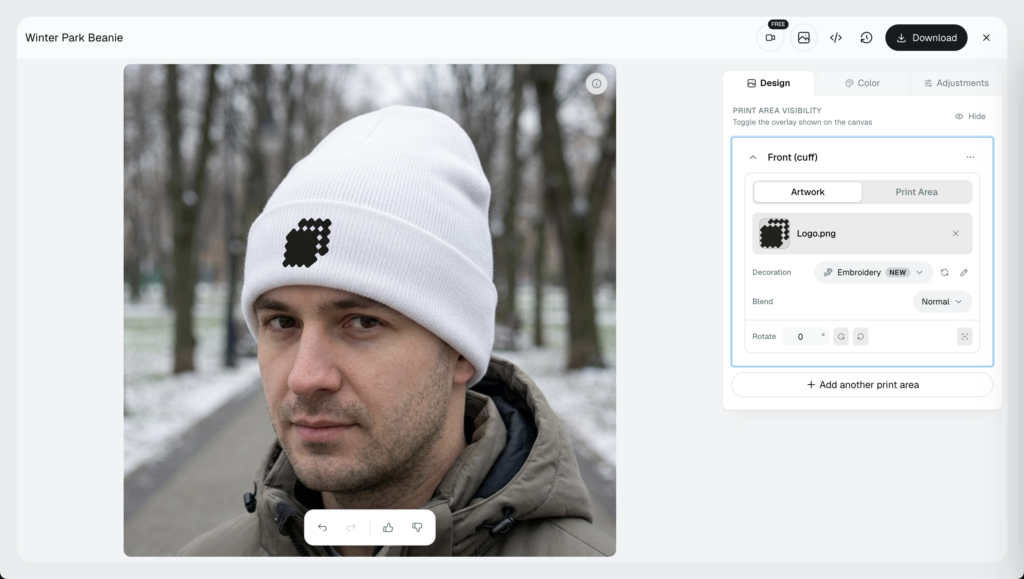
When you’re ready to scale, the bulk mockup generator renders every colorway, or an entire collection, in one run. Feed it a design set and get a full listing gallery back.
The payoff is simple. One logo upload turns into a full listing gallery and a set of variant images, fast. That’s the difference between listing a single cap and launching a line.
Bonus: Download a Ready-to-Stitch DST From the Same Upload
Here’s where the preview stops being just a picture.
The same logo that made your mockup can output a downloadable Tajima DST machine file through the Stitch AI digitizer agent. Sell the preview, then produce from the file, all from one upload.
DST is the format your embroiderer is almost certainly asking for. It’s the most widely accepted machine embroidery format, read by nearly every commercial machine on the market. If it’s new to you, here’s what a DST file is and how to open it.
For a straightforward logo, that means no separate digitizing step and no extra digitizer fee. The preview your customer approved and the file your shop stitches come from the same artwork, so nothing drifts between the sale and the sew-out.
That closes the gap most tools leave open. A staged stock photo gives you an image and nothing to stitch. Dynamic Mockups gives you one AI embroidery workflow: a preview to sell and a machine file to produce, in the same place.
Hand the DST to your embroiderer, run a quick test stitch-out on scrap fabric, and you’re in production.
Create your account for free and make your first embroidered hat mockup, in your browser, in the next few minutes.
Showcase your E-commerce products like big brands, without costing a fortune. Sign up today. No credit card required. →
Frequently Asked Questions
How do I make an embroidered hat mockup from my logo?
Open Dynamic Mockups, pick a cap template, set the decoration method to Embroidery, and upload your logo as a PNG. The Stitch AI agent renders a photoreal thread preview scaled to the cap’s real print area in seconds, with no Photoshop. Position the mark on the cap front, save it as a reusable template, and you’re done. It’s free to start.
Can a mockup show real embroidery thread on a cap?
Yes. That’s the whole point of embroidery mode. A flat PNG pasted onto a hat photo reads as a sticker, but the Stitch AI agent renders your logo as actual thread, with raised texture and the directional sheen real stitches catch in the light. It wraps the design to the curve of the panel, so it looks sewn rather than painted on.
What file do I need to embroider a logo onto a hat?
Your embroiderer almost certainly wants a Tajima DST file, the most widely accepted machine embroidery format read by nearly every commercial machine. The good news: the same logo that makes your mockup can output a downloadable DST through the Stitch AI digitizer agent. For a straightforward logo, that means no separate digitizing step and no extra digitizer fee.
Is there a free way to make embroidered cap mockups?
Yes. Dynamic Mockups is free to start, with no credit card required. Pick a cap template, switch to embroidery, upload your logo as a PNG, and let Stitch AI render the thread preview in your browser. You can save reusable templates and build full colorway sets without paying, and there’s no Photoshop involved at any step.
Do embroidered hat mockups work for left chest logos and beanies?
Yes. One saved template stretches across placements. Move the same logo to a left chest spot for a matching polo or tee, keeping the mark small so it stays in proportion. Drop it onto a beanie and the design shifts up onto the cuff. Same source art, no new upload, so you get a coordinated set from a single file.
![How to Make an Embroidered Hoodie Mockup From Your Logo [2026]](https://dynamicmockups.com/wp-content/uploads/2026/10/embroidered-hoodie-mockup-cover-768x403.png)