


![What Is a DST File? How to Open and Use It [2026 Guide]](https://dynamicmockups.com/wp-content/uploads/2026/08/what-is-a-dst-file-cover-768x403.png) Embroidery
Embroidery
On this page
What Is Embroidery Digitizing?
Embroidery digitizing is the process of converting a digital image into a stitch file that an embroidery machine can read and sew. That is the whole job in one sentence.
Here is the part most people miss. Your embroidery machine cannot sew a PNG or a JPG. It does not read pixels the way your screen does, so a flat image means nothing to the needle.
What the machine actually needs is a stitch plan. That plan spells out the paths the needle travels, the stitch type that fills each shape, the direction and density of every section, and the order your thread colors run in.
The needle follows those instructions, not the picture. That gap between a nice-looking image and a sewable set of commands is the entire reason digitizing exists.
The output of all that planning is a machine file. The most common one is a Tajima DST, a format that tells the needle exactly where to go, one stitch at a time.
So digitizing sits between your artwork and your finished patch. Get it right and a logo sews crisp and clean. Get it wrong and you get puckering, gaps, and thread nests.
For a print-on-demand seller, that difference is the whole game. A well-digitized logo on a cap or a polo reads as premium. A rushed one looks homemade, and shoppers can tell at a glance. If you are ready to add it as a service, here is how to start offering embroidery in your print shop.
This guide covers what you need before you order or make your first file: how the embroidery digitizing process works, the three core stitch types, why underlay matters, what drives the cost, and the three honest ways to get a design digitized.
Let’s get into it.
How a Design Becomes Stitches: Inside the Digitizing Process
Digitizing is a hand-built plan. It is not an auto-trace, and it is not a filter you slap on top of pixels.
A skilled digitizer, or a purpose-built AI agent, reads your artwork and makes a series of decisions the machine will follow to the letter. Here is how embroidery digitizing works, start to finish.
First, read the artwork. The digitizer studies the shapes, the fine detail, and the color breaks to work out what can realistically sew at the size you want.
Next, map each shape to a stitch type. Thin lines and lettering call for one kind of stitch; large solid areas call for another. More on those types in the next section.
Then set stitch direction and density. Direction controls how light hits the thread and how the design reads. Density controls how tightly the stitches pack, which affects both coverage and how well the fabric survives.
After that, sequence the thread colors. The plan groups stitches by color and orders them to cut down on thread changes and hold registration, so each color lands where it should.
Finally, export the machine file. This is the moment your plan becomes a file the machine can load, most often a Tajima DST. If you want the format detail, here is what a DST file actually is.
One thing separates real digitizing from a quick trace: it plans for the physical world. Good digitizing maps each shape to a stitch type and sets its direction, density, and underlay so the design lands clean on fabric, not just on a screen.
Fabric also stretches and shifts as the needle works, an effect called push and pull. A good digitizer compensates for it in advance, nudging shapes slightly so a circle still reads as a circle after it sews.
Fabric type matters here too. A thick fleece and a thin woven shirt behave very differently, and the stitch plan changes to match. This is the heart of digitizing for machine embroidery, and it is why the same logo may be digitized twice for two different garments.
We are keeping this high level on purpose. The hands-on logo walkthrough belongs in its own guide.
The 3 Embroidery Stitch Types: Satin, Fill, and Run
Almost every design you will ever sew is built from three embroidery stitch types. Learn these and you can read a stitch plan like a map.
Satin stitch lays closely spaced stitches across a shape for a smooth, glossy sheen. It is the default for lettering, borders, and thin columns, which is why logos and monograms lean on it so heavily. Keep it to narrow shapes, though; stretched too wide, the long stitches snag and loosen.
Fill stitch, also called tatami, blankets large areas with rows of shorter stitches. It gives full coverage with a flatter, textured finish, so it handles backgrounds, big letters, and any solid block a satin stitch would be too wide to cover cleanly.
Run stitch is a single light line of stitches. It handles outlines, fine detail, and small text, and it does quiet work as a building block for underlay. The run stitch is the most basic and flexible of the three.
Most designs mix all three. A digitizer might set your logo text in satin, fill the crest behind it, and outline the edges with a run stitch.
Here is the quick reference:
| Stitch Type | Best For | Look |
|---|---|---|
| Satin | Lettering, borders, thin columns | Smooth, glossy sheen |
| Fill (Tatami) | Large areas, backgrounds, big shapes | Flat, textured, full coverage |
| Run | Outlines, fine detail, underlay | Thin, light, single line |
Underlay: The Foundation Layer Beneath Every Design
Underlay is a set of hidden stitches laid down first, before any of the stitches you actually see. You never notice it in a finished piece, and that is the point.
Its job is to anchor the fabric and prep the surface. Those first stitches tack the material to the backing so it cannot shift, pucker, or bunch once the top stitches pile on. Underlay stabilizes the fabric and reduces puckering before a single top stitch goes down.
Underlay also stops your design from sinking. On fluffy or textured fabric like fleece or terry cloth, stitches want to disappear into the pile. A layer of underlay lifts the design so it sits on top and stays crisp.
It holds registration too. When the fabric stays put, every color lines up where the plan intended, so outlines meet fills and letters keep their shape.
There is more than one kind of underlay, as well. Digitizers choose between edge run, zigzag, and tatami underlay based on the fabric and the stitch going over it, so a soft knit polo and a structured cap each get the base they need.
Here is the takeaway worth remembering: underlay is the foundation of the whole design. Skip it, and even flawless top stitching ends up looking sloppy.
Why Stitch Count Drives Digitizing Cost
Here is the number that governs embroidery pricing: stitch count. More stitches means more machine time, and machine time is what you pay for, both to digitize the file and to sew every piece afterward.
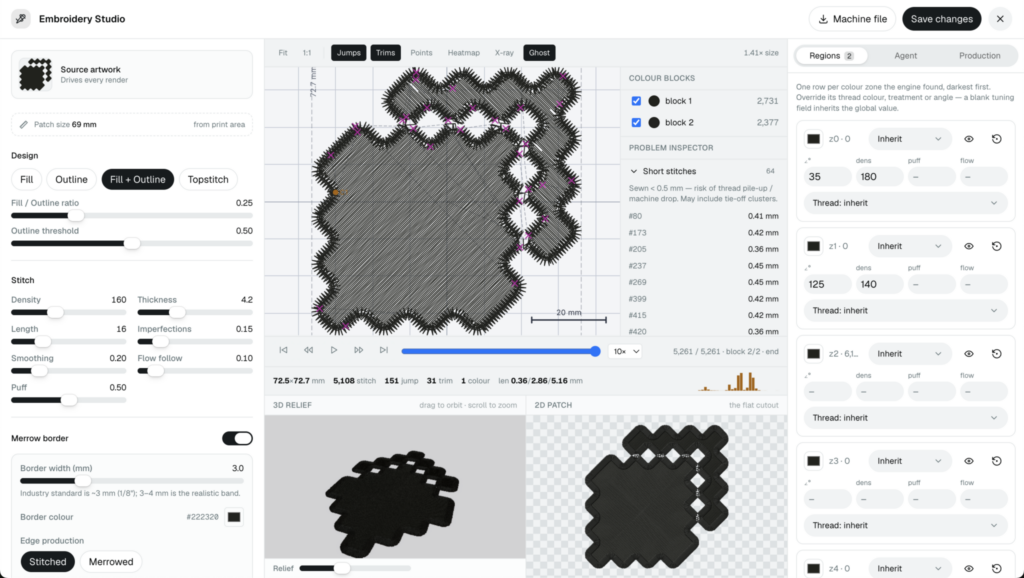
That is why two designs of the same physical size can cost very different amounts. A simple wordmark might run a few thousand stitches. A detailed crest with shading can climb into the tens of thousands.
A handful of things push the count up:
- Design size: bigger artwork needs more stitches to fill.
- Stitch density: tighter packing lays down more thread per shape.
- Large fill areas: solid blocks eat stitches fast.
- Tiny detail: small text and fine lines force extra, careful stitching.
- Thread colors: more colors mean more sequencing and more stops.
Clean digitizing keeps that count efficient. A good digitizer covers each shape properly without padding the file with stitches that add cost and no visible detail.
Pricing itself comes in two shapes. Many bureaus charge a flat rate per file, often starting around $10 for a standard design. Larger or more complex jobs often switch to a stitch-count model, averaging about $2 to $4 per 1,000 stitches.
For a POD seller ordering one logo, the cost is a rounding error. Order fifty designs across a catalog, and efficient digitizing is what keeps your margins intact.
We are keeping the numbers light on purpose. The full price breakdown, with real quotes and examples, deserves its own post.
3 Ways to Get Your Artwork Digitized [Compared]
Once your artwork is ready, you have three realistic ways to turn it into an embroidery machine file. Each one asks you to trade something different: your time, your money, or your control.
1. Hire a Digitizing Bureau or Freelancer
The hands-off route. You send artwork to a digitizing bureau or a Fiverr freelancer, they build the file, and you get a DST back.
It works well when you are busy and the design is straightforward. The trade-off is the queue.
You wait your turn, you pay per file, and every revision adds another round trip. If a letter sits wrong, you send it back and wait again.
2. Buy Desktop Digitizing Software
The full-control route. Programs like Wilcom and Hatch let you place every stitch yourself, which is how professional digitizers work.
The catch is real. These tools have a steep learning curve, and a full license can run into the hundreds or thousands of dollars. Worth it if you digitize daily, hard to justify for the occasional file.
3. Use an AI Digitizing Agent
The self-serve route. A newer option reads your artwork and writes the stitch plan for you, in the browser, in seconds.
It is fast and beginner-friendly, with no queue and no license to buy. You upload your design, get a preview and a file, and refine from there.
Here is how the three stack up:
| Method | Speed | Cost | Skill Needed | Control |
|---|---|---|---|---|
| Bureau / freelancer | ⚠️ Queue-based | Per file | ✅ None | ⚠️ Revisions only |
| Desktop software | ⚠️ Slow to learn | High license | ❌ Steep | ✅ Full |
| AI digitizing agent | ✅ Seconds | Low / free tier | ✅ Beginner | ✅ In-editor |
Want to see the tools that do this in practice? We rounded up the best embroidery mockup generators that also handle the stitch side.
How Dynamic Mockups Turns Your Artwork Into a Machine File
This is the self-serve route in practice, and it is where Dynamic Mockups fits.
We created Stitch AI – the first embroidery digitizing agent that has expertise and creativity like a professional digitizer.
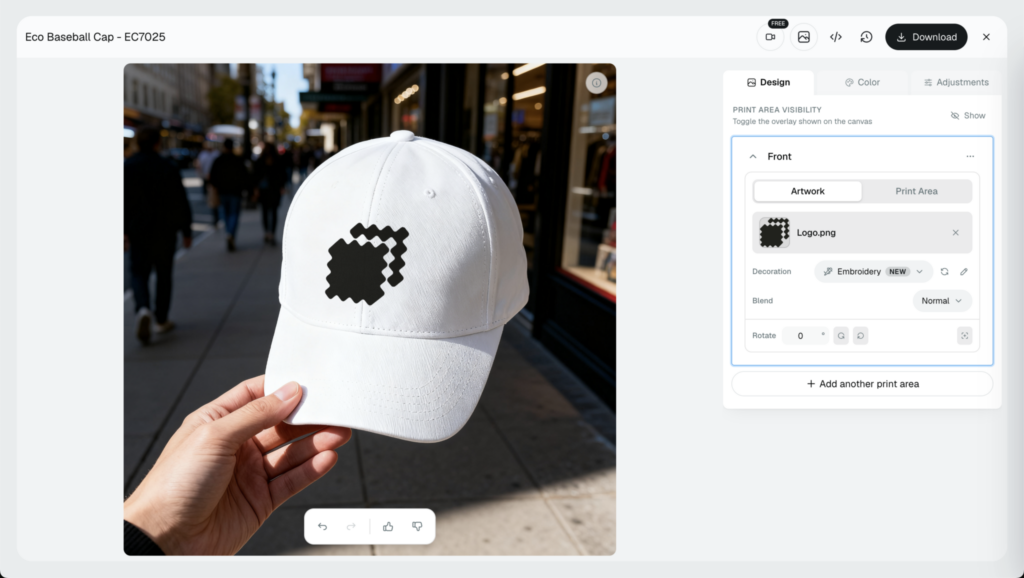
Upload your PNG, and our Stitch AI agent reads the artwork into a realistic embroidery preview. You drop that preview straight onto a product mockup, so you see the design stitched on a cap, a polo, or a patch before a single needle moves.
From there, open the advanced editor to refine the design. When it looks right, export a downloadable Tajima DST machine file that you keep and load onto your machine.
Think of it as an advanced AI embroidery stitch agent doing two jobs at once. It shows your design on a real product, and it hands you a usable file, with no Photoshop and no digitizing queue.
The embroidery studio is where you position, scale, and preview your work. Pair your embroidery with any of our 100,000+ free mockup templates and you have a full product shot in minutes.
You can try the whole thing free, no credit card required. The paid plans add volume and automation only when you need to scale, so you start where you are and grow when the orders do.
Ready to see your design as stitches? Upload your artwork and preview your first embroidery mockup for free.
Showcase your E-commerce products like big brands, without costing a fortune.
Sign up today. No credit card required. →
Frequently Asked Questions
What is embroidery digitizing in simple terms?
Embroidery digitizing is the process of converting a digital image into a stitch file your embroidery machine can read and sew. The file spells out the needle paths, stitch types, direction, density, and the order your thread colors run in. Your machine follows that plan step by step. The most common output is a Tajima DST file.
Can an embroidery machine read a PNG or JPG file?
No. An embroidery machine cannot sew a PNG or JPG. It does not read pixels the way your screen does, so a flat image means nothing to the needle. The machine needs a stitch file that spells out exact needle paths, stitch types, density, and color order. Digitizing bridges that gap by turning your image into a sewable set of commands, usually a Tajima DST.
What are the main stitch types used in embroidery digitizing?
Almost every design is built from three stitch types. Satin lays closely spaced stitches for a smooth, glossy sheen, ideal for lettering and borders. Fill, also called tatami, blankets large areas with rows of shorter stitches for flat, full coverage. Run is a single light line for outlines, fine detail, and underlay. Most designs mix all three.
Do you need expensive software to digitize a design for embroidery?
Not anymore. Desktop programs like Wilcom and Hatch give full control but carry a steep learning curve and licenses that run into the hundreds or thousands. They only pay off if you digitize daily. For most sellers, a browser-based AI digitizing agent reads your artwork and writes the stitch plan in seconds, with a free tier and no license to buy.
How much does it cost to digitize a design for embroidery?
Cost is driven by stitch count, since more stitches means more machine time. Many bureaus charge a flat rate per file, often starting around $10 for a standard design. Larger or more complex jobs switch to a stitch-count model, averaging about $2 to $4 per 1,000 stitches. Browser-based AI tools often include a free tier for single files.
![7 Embroidery Digitizing Mistakes and How to Avoid Them [2026]](https://dynamicmockups.com/wp-content/uploads/2026/08/embroidery-digitizing-mistakes-cover-768x403.png)