If you’re just starting your ecommerce journey in print-on-demand, you might wonder how to create clean, editable mockups.
The fastest and most consistent way to solve this problem is by properly setting up your PSD files.
A PSD lets you easily swap designs, adjust layers, and create multiple product visuals without starting from scratch.
In today’s article, we’ll dive into an actionable guide on how to use PSD mockups.
Let’s get started!
Why use a PSD File for Product Mockups?
Before diving into the how-to, let’s review the benefits of using PSD files for product mockups:
✅Enables Realistic Visualization – PSD files let you build photorealistic mockups that show exactly how your design will appear on the final product before you make it.
✅Layered Editing Flexibility – Work with layers, masks, and effects to tweak individual elements like text, colors, and backgrounds without redoing the whole file.
✅Streamlines the Design Process – Use ready-made PSD templates to quickly swap in designs, update branding, and produce new visuals without starting from scratch.
✅Reduces Production Costs and Errors – Spot layout and scaling problems early by reviewing mockups digitally, saving money on bad prints and unnecessary prototypes.
✅Professional Presentation – Present your designs in a clean, realistic format that builds trust, increases perceived value, and helps drive conversions.
✅Versatile Output Options – Export your final mockup in the format you need – JPEG, PNG, or other for use across eCommerce platforms, ads, or print materials.
✅Supports Customization and Branding – Adjust colors, styles, and layout to match your brand’s tone and keep your visuals consistent across campaigns.
How to Prepare a PSD File and Use It Step-by-Step
1. Set Accurate Dimensions and Resolution First
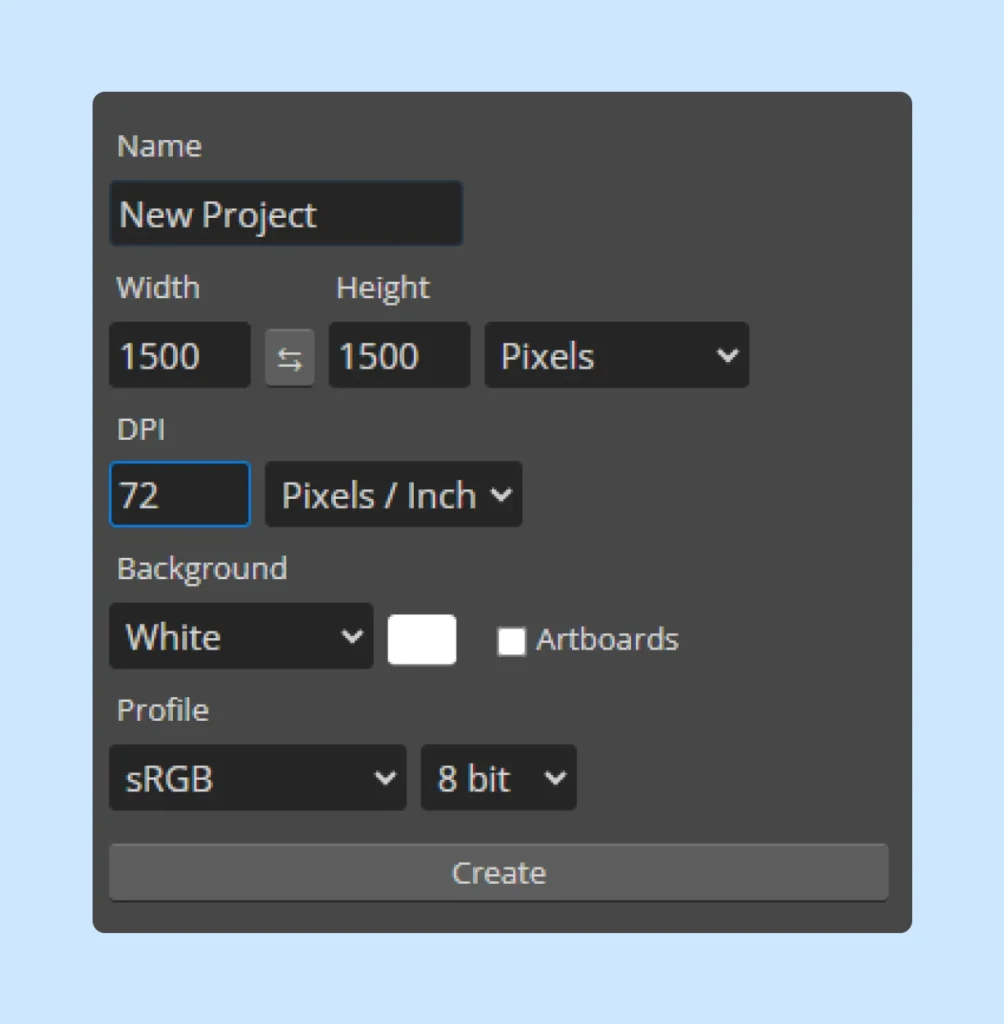
Set your canvas to around 1500×1500 pixels at 72 dpi for digital or online mockups to balance quality and fast loading, perfect for websites, online stores, and mockup generators.
For print or detailed presentations, use larger dimensions like 4000×3000 pixels at 300 dpi to ensure crisp details and professional print quality.
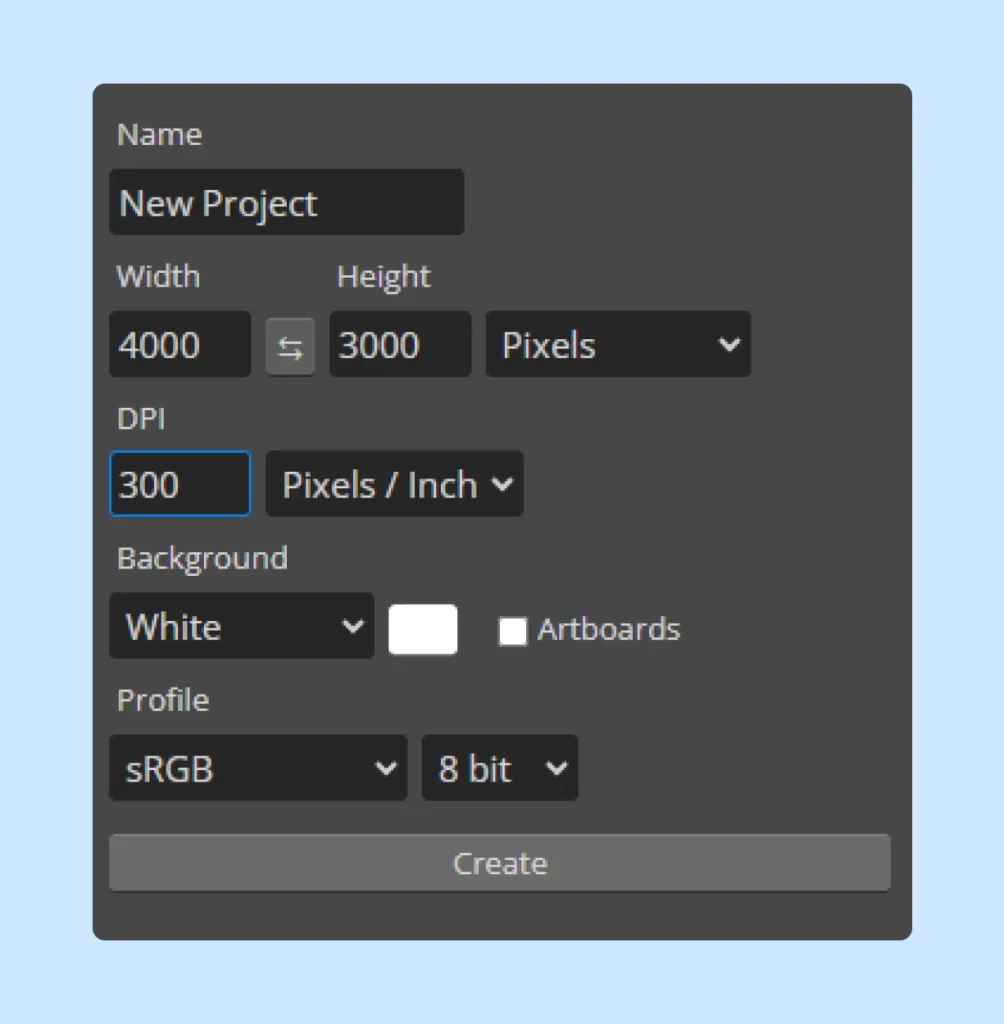
Be aware that higher resolution creates bigger files and slower editing.
📌 Use the same dimensions for all your product mockups within a project or brand to ensure a consistent, professional look across your portfolio or online shop.
2. Maintain Clear and Logical Layer Organization
Clear layer names help you and others quickly find and edit specific parts of your mockup.
Use descriptive names that reflect each layer’s content or function, avoiding generic labels like “Layer 1.”
For example, name layers: “Background,” “T-shirt – White,” or “Artwork – Main Design.”
When you have similar elements, add details to distinguish them, such as:
“Button – Red,” “Shadow – Back,” or “Artwork – Accent.”

Maintain consistent naming patterns throughout your file and for special layers like placeholders or smart objects, add prefixes such as “Design Placeholder,” “SmartObj – Label,” or “mm_img:Front” (common for mockup generators).
3. Use Smart Objects as Design Placeholders
Smart Objects let you insert, update, and scale your design without losing quality.
They work as flexible containers for your artwork, making it easy to swap in new designs for different products or clients.
Here’s an example of how to use them:
☑️Identify the product area where your design will appear – like the front of a T-shirt, a sweatshirt, or a mug surface.
☑️Convert that layer or selection into a Smart Object by right-clicking it in the Layers panel and selecting “Convert to Smart Object.”
Double-click the Smart Object thumbnail to open it in a new window.
☑️Paste or place your artwork there. When you save and close the window, your mockup updates automatically.
Keep Smart Objects simple by including only the placeholder image and, if needed, a color fill layer.
Avoid adding extra effects, adjustment layers, or smart filters inside the Smart Object since these can cause compatibility issues with mockup generators.
Name your Smart Object layers clearly (for example, “Design Placeholder” or “Label – Smart Object”) so it’s obvious where to add new artwork.
For products with multiple printable areas, create separate Smart Objects for each area.
💡Pro Tip
Check out our detailed guide on the best T-shirt design software to improve and streamline your T-shirt mockup creation!
4. Reduce File Size for Efficiency
When cropping or resizing your canvas, check “Delete Cropped Pixels” to permanently remove hidden data outside the visible area and keep your file size small.
Regularly clean your Layers panel by deleting unused layers, hidden elements, guides, adjustment layers, test artwork, and duplicates.
Check the Paths and Channels panels and remove any unnecessary paths, alpha channels, or spot colors to reduce file size and improve performance.
5. Upload Your PSD to Dynamic Mockups
Dynamic Mockups lets you create high-quality custom product mockups easily using PSD files.
Take a look at this quick tutorial on using your Photoshop templates with our tool to improve your mockup results:
Once you upload your PSD file to our platform, you can navigate to open the Template and add your designs and color options.
Automatically align your designs using Smart Objects so every element lands in the right place. Keep your workflow fast and efficient with the Photoshop API – no manual work needed.
Once your mockups are ready, connect with our eCommerce integrations like Etsy to quickly update your product listings with the new visuals.
Wrapping Up
Learning how to prepare and use a PSD file may take a few extra steps and some basic Photoshop skills, but the results are worth it.
With versatile features our tool offers, you can customize your mockups endlessly until they look polished and professional.
Additionally, if you want a tool that doesn’t require design skills, only creativity and a good idea, Dynamic Mockup is a smart choice.
How Dynamic Mockups Can Help You Create Stunning Mockups
Dynamic Mockups is an automated tool that turns your PSD templates into sharp, ready-to-use mockups.
It helps you scale your eCommerce store with features tailored for the print-on-demand business.
Check out our hands-on video guide where we walk you through using Photoshop to get your PSD file ready for upload to Dynamic Mockups.
With our tool, you can also:
✨Generate Mockups in Bulk
Use our Bulk feature to generate up to 100 mockups in under 10 seconds. Just upload your designs and color variations, then watch how the tool creates all combinations quickly.
✨Explore Template Library
Skip manual template creation by accessing our growing library of over 1000 mockup templates. It includes popular products like T-shirts, sweatshirts, hoodies, mugs, phone cases, and wall art.
✨Apply Advanced Editing Features
The editing tools allow you to:
- Explore a wide range of color options, including expert-curated palettes from Printful and Printify.
- Add depth, style, and personality with just a few clicks.
- Effortlessly adjust, resize, and reposition your elements with smart tools that handle the heavy lifting for you.
Excited to try it out?
Start with Dynamic Mockups today and create professional and polished designs that drive conversions!
Keep Learning
PSD Formatting Guide for Uploading to Dynamic Mockups
How Much Does it Cost to Start a Print-on-Demand Business?
5 Ways to Use Mockups to Validate Product Ideas [+ Pro Tips]