Why settle for standard when your customers want personalized?
In eCommerce niche, personalization isn’t just a nice-to-have – it’s what drives conversions. Shoppers expect to tweak, tailor, and visualize products to fit their exact preferences. The smartest way to deliver that experience? Embed a product configurator that turns casual browsers into confident buyers.
Did you know that interactive tools like configurators can increase purchase confidence by up to 66%?
But building one doesn’t have to mean hiring developers or using complex software.
Read on to learn how to set up a product configurator so your customers can customize visuals without any issues while your store runs smoothly.
Product Configurator Setup Overview
Here’s a step-by-step breakdown of what it takes to add a product configurator to your website.
| Step | What it covers | Why it matters |
| 1. Choose a product configurator tool | Pick a tool compatible with your store | Ensures your configurator integrates smoothly and supports the type of customization you offer |
| 2. Set up product templates and variants | Define customizable elements like color, size, and placement | Helps structure your configurator logic and makes visual previews accurate and reliable |
| 3. Integrate into your website | Embed or connect the configurator to your live product pages | A working configurator boosts engagement and builds trust during the buying process |
| 4. Automate visuals and fulfillment | Use tools to auto-generate mockups and sync order data | Saves time, reduces human error, and supports scalable fulfillment workflows |
| 5. Launch, test, and optimize | Monitor performance, tweak layout, and test CTA placement | Keeps the experience smooth across devices and helps boost conversions with data-backed adjustments |
Step1: Choose the Right Product Configurator Tool
The first step in setting up your product configurator is choosing a tool that aligns with your store’s needs and technical setup.
This decision impacts everything that follows, from how easily you can create and update mockups to how smooth the user experience feels for your customers.
There are generally two types of configurator tools:
- No-code/low-code platforms that provide drag-and-drop interfaces and prebuilt components.
- Developer-focused solutions that offer full customization through APIs and SDKs.
For most print-on-demand sellers and small to midsize eCommerce businesses, no-code solutions are more practical.
They’re easier to implement and maintain, especially if you don’t have a technical team.
Tips for choosing the configurator:
When choosing your configurator, consider the following:
- Compatibility with your platform – Make sure the tool works with your eCommerce setup (Shopify, WooCommerce, custom site, etc.).
- Visual preview support – Does the configurator offer real-time mockups that reflect customer selections?
- Upload and input flexibility – Can customers upload their own designs, change colors, add text, or select product variants easily?
- Performance and speed – A slow or buggy configurator will frustrate users and lower conversions.
- Scalability and automation options – If you offer many variants or plan to grow, automation for mockup generation and asset handling becomes essential.
When it comes to visual configuration and mockup generation, you’ll also want a tool that doesn’t require manual updates every time you add a new product or variant.
Look for platforms that can bulk-generate images, integrate with your backend, and update product visuals automatically when changes are made.
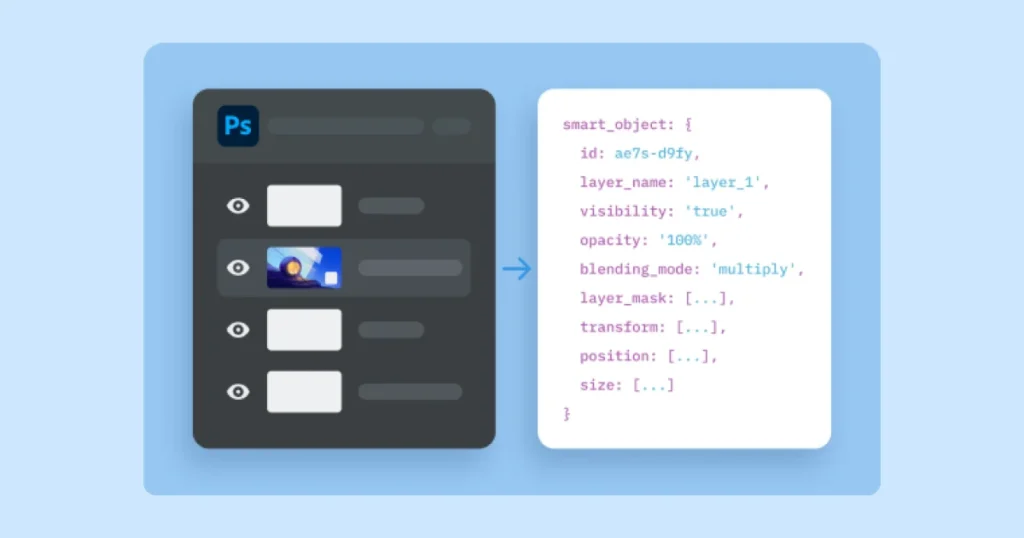
If you’re working with layered PSD files or want precise visual control, make sure your configurator supports custom template uploads and high-resolution exports.
💡ProTip
With Dynamic Mockups, you can integrate our Embeddable Product Configurator directly into your website, app, or print-on-demand platform, no code skills required.
You only need to copy and paste a snippet of code, and get a full-fledged mockup editor.
Then, you can add designs, change colors and control everything from your Dynamic Mockups dashboard.
As a result, your shoppers can access all customization features directly on your website, without leaving your platform, leading to improved engagement and a better customer experience.
Step 2: Set Up Your Product Templates and Variants
Once you’ve selected the right configurator, it’s time to define what shoppers can customize and prepare the visual assets for each configuration.
Start by outlining your customization logic. Think through every possible combination of custom products you can sell:
- Product types — T-shirts, mugs, phone cases, etc.
- Design options — Upload fields, text inputs, design selection.
- Placement areas — Front, back, sleeves, sides.
- Color and size variants
- Dependency logic — For example, hiding a design area if a zipper is selected.
Then, move on to your design assets, which are the basics for visual previews:
- Layered PSD templates that allow for dynamic customization.
- Transparent PNGs or SVG files for design overlays.
- Organized asset folders to keep track of variants and input fields.
- Consistent resolution and formatting to avoid display issues across mockups.
💡 ProTip
If you’re using Dynamic Mockups, you can speed up the process significantly.
Instead of manually exporting mockups one by one, you can upload your Photoshop templates and bulk-generate all visual variants in a few clicks.
What’s more, Dynamic Mockups gives you full creative control with advanced editing tools:
You can easily:
- Customize colors using a quick color picker or built-in palettes from Printful and Printify.
- Auto-fit, resize, and position your design for pixel-perfect, professional mockups.
- Add visual effects like shadows and depth — no advanced skills required.
Step 3: Integrate the Configurator into Your Website
Once your customization logic and assets are ready, the next step is bringing the configurator to life on your storefront. The way you integrate it depends on your platform, but the goal stays the same: make the experience seamless, intuitive, and fast.
There are several ways to add a product configurator to your website:
- Embed widgets: Tools that generate a simple embed code, such as an iframe or HTML snippet, which you paste into your product page. It’s ideal for platforms like Shopify, Wix, or Webflow.
- Native plugins or apps: These plug directly into platforms like Shopify or WooCommerce and often include a drag-and-drop builder.
- API or SDK integration: For more complex or custom storefronts, such as headless setups, you can use JavaScript SDKs or APIs to embed configurators more deeply.
- External hosted pages: Some configurator tools host the experience externally and link from your store, but this often creates friction and isn’t ideal for conversion.
No matter the method, two things are critical:
- Performance – Slow configurators frustrate users. Test on mobile and desktop to ensure fast load times and smooth UI.
- Consistency – Match the configurator design with your store’s branding. A visual mismatch creates distrust, even if the functionality is strong.
Step 4: Set Up Automation for Mockup Generation and Order Fulfillment
Adding a configurator is only half the story. Once a customer clicks “Buy,” their choices must turn into a clear, ready-to-use file that goes to production fast.
Here’s what your automation setup should cover (and why):
- Mockup generation: Automatically generate visuals based on each customer’s input. This gives your team or print partner a crystal-clear reference, reduces production errors, and avoids the need for manual image editing.
- Print file preparation: Convert customizations into layered or flattened production files (PDF, PNG, PSD) with the correct sizing, bleed, and resolution. Look for tools that let you define these parameters once and apply them at scale.
- Order sync and data transfer: Ensure that product variants, custom design inputs, and customer info are passed cleanly into your order management or fulfillment system. Missing or misformatted data here is a common cause of production delays.
- Production workflow automation: Set up alerts, order queues, or auto-routing to your print provider the moment a new customized order comes in. This removes bottlenecks and helps maintain fast turnaround.
If you want to do all of this without hiring a developer, Dynamic Mockups connects with platforms lik, Etsy, Zapier, WooCommerce and Make.
It provides full automation from design upload to mockup generation, seamlessly integrating everything into your production pipeline without errors.
Step 5: Launch, Test, and Optimize the Experience
Once your configurator is live, your next priority is making sure it works – not just technically, but in terms of how customers actually interact with it.
After all, while product customization can skyrocket your eCommerce sales, you can’t expect to see good results with a bad configurator.
Here’s how to launch smart and optimize continuously:
5.1. What to Test Before and After Launch
- Performance across devices: Test how the configurator works on desktop, tablet, and mobile. Since a lot of shoppers browse on phones, so touch responsiveness, zoom, and loading speed all affect conversions.
- Load times: Studies show that every extra second of page load time can decrease conversions by around 4.4% Meanwhile, 82% of shoppers will interact with a 3D product model, but only if performance is smooth and responsive.
- Accuracy of previews: Make sure final mockups look exactly like what customers configure. Remember that wrong previews lead to returns and lost trust.
- Customer journey clarity: Is it obvious how to customize? Are tooltips or instructions needed? Add small UX enhancements to prevent drop-off during configuration.
5.2. Optimization Tips That Drive Results
- Use heatmaps and session recordings: Tools like Hotjar or Microsoft Clarity help you identify where users struggle or abandon the configurator. Are they hesitating on certain steps? Not seeing the CTA?
- A/B test layout and copy: Try different button placements, instructions, or even color schemes to improve engagement. For example, some stores see higher conversions with sticky “Customize Now” buttons on scroll.
- Add progress indicators: Multi-step customization flows should show users where they are. This reduces drop-off by setting clear expectations.
- Track conversion and abandonment rates: Compare performance between configurable and non-configurable products. If customizable items convert worse, something in the process may be broken or unclear.
💡Worth Knowing
Don’t just launch it and leave it.
The best-performing configurators are constantly improving. Small tweaks, such as faster loading, clearer previews, or better instructions, can build up into major gains over time.
🎁Bonus: 5 Quick Tips to Make Your Product Configurator Actually Convert
Adding a product configurator to your website isn’t just about offering customization — it’s about making the experience smooth, clear, and scalable.
Here’s what to keep in mind if you want your configurator to actually convert:
- Product configurators boost engagement and conversions — Giving users the ability to customize products increases their confidence and likelihood to buy.
- Good planning is everything — Before implementation, make sure you’ve mapped out all variants, assets, and user flows. It prevents issues later.
- Keep it simple for users —Too many options can overwhelm. Clear visuals, smart defaults, and intuitive steps make all the difference.
- Automation is essential for scale — Manual workflows won’t cut it once orders ramp up. Automate mockup generation and data handling wherever possible.
- Testing is non-negotiable — Speed, UX, and visual accuracy can make or break the experience. Monitor performance and refine continuously.
Wrapping It Up
Adding a product configurator to your website is one of the smartest moves you can make if you’re selling customizable products, and it doesn’t have to be a drag. However, the entire process can feel a lot more manageable when you approach it strategically.
But even with a great configurator in place, visuals are what seal the deal. That’s why you need Dynamic Mockups.
We combine advanced mockups, customization, and the latest trends in product images so you can create your visuals fast and effortlessly.
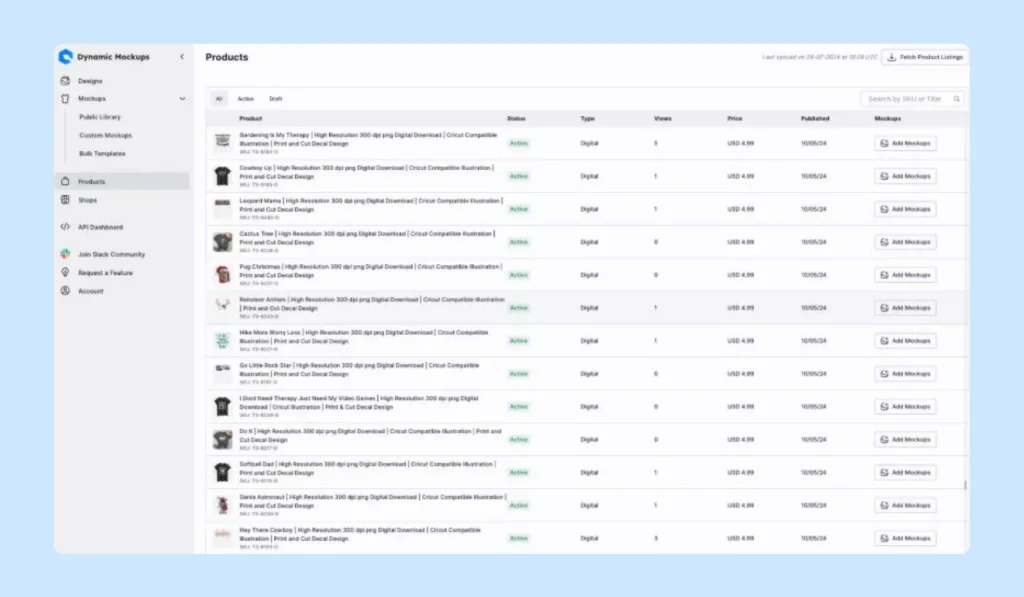
How Can You Turn Product Configurations into Ready-to-Produce Files with Dynamic Mockups?
Built specifically for eCommerce and POD businesses, Dynamic Mockups provides an all-in-one platform with live previews and advanced customization.
Whether you’re building out product previews, refreshing seasonal visuals, or preparing your entire catalog for launch, we help you automate the process without losing creative control.
What’s in store for you?
✨Bulk mockup generation — Allows you to generate a great number of mockups in one go.
This is perfect when your configurator includes multiple colors, angles, or layout options. Just upload your design, and the platform takes care of the rest.
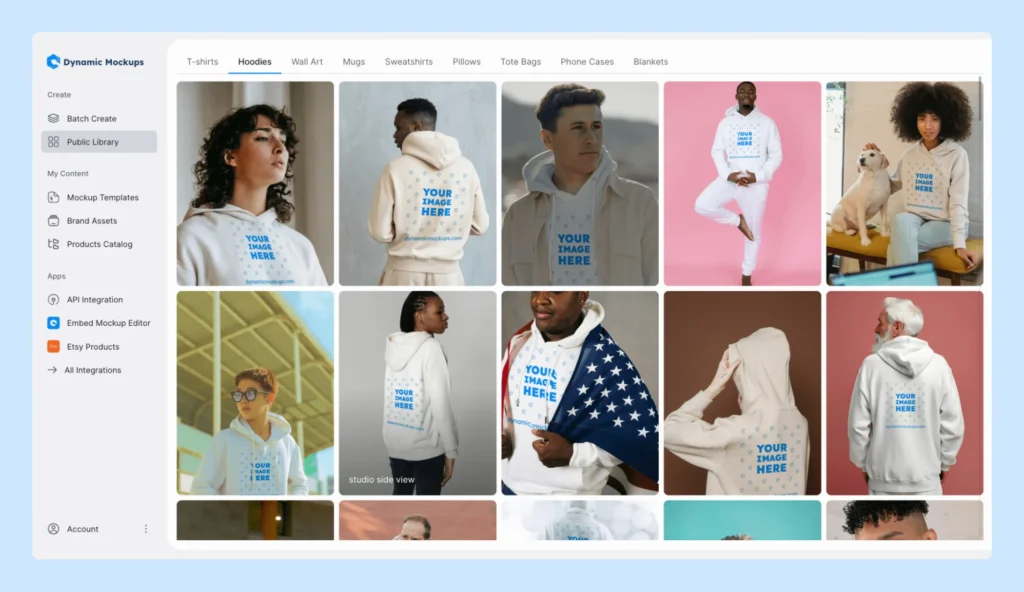
✨ Template Gallery — Access a variety of mockup templates spanning T-shirts, Hoodies, Wall Art, Mugs, etc., which you can customize further.
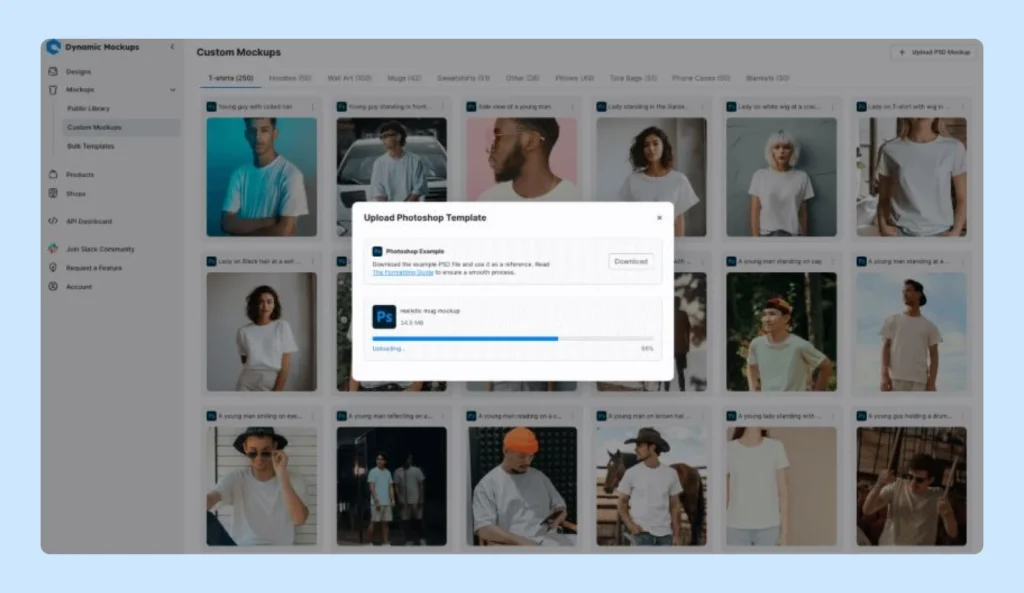
✨Custom Photoshop template support — If you already have branded PSDs you use for mockups, you can upload them directly to Dynamic Mockups and use them as the base for all configurator previews.
Thus, you don’t have to rely on generic templates, and your customers will see exactly what the final product will look like.
✨ Mockup API and integration support — With the Mockup API and integrations via Zapier or Make, you can automate visual generation based on customer selections, without manual file handling.
✨ Organized asset library — Stores and categorizes all your visual, so you can easily update configurator previews, swap designs between product types, or run A/B tests without browsing folders or recreating assets from scratch.
If your goal is to streamline your configurator workflow and show customers exactly what they’re getting, Dynamic Mockups gives you everything you need — fast visuals, seamless automation, and brand-level polish.
Curious to learn more?
Try Dynamic Mockups for free to automate the creation process and see how much time you can save.